Table of Contents
- The Parallelism of the Squeegee Significantly Affects Printing Results!
- Squeegee Attachment Procedure
- Squeegee Parallel Adjustment Procedure
- Products Used in This Article
The Parallelism of the Squeegee Significantly Affects Printing Results!
The principle of screen printing is quite simple.
In summary:
- Coat the screen with paste using a squeegee,
- Apply downward pressure on the squeegee while squeegeeing (applying pressure just enough to scrape off excess paste),
- Allow the paste to pass through the pattern openings and transfer onto the workpiece.
Now, let’s focus on the “squeegee” involved in step 2.

Micro Squeegee
Ideal squeegee for practical application of proper printing pressure processes
The squeegee is a part attached to the squeegee head unit.
Its main function is to scrape off paste that doesn’t pass through the pattern openings. When performing this action, the paste is pressed against the squeegee’s rubber, causing it to roll and be ejected from the screen.
When the squeegee is parallel to the table and the workpiece, the rubber applies uniform force to the paste, resulting in smooth ejection. Conversely, if the squeegee is not properly adjusted in parallel, variations in force occur, leading to rubbing or unevenness in the printing pattern. Therefore, it’s essential to ensure proper squeegee alignment before printing.
In this article, we’ll introduce the squeegee parallel adjustment using our product, the screen printing machine “MT-320 Series.”

Screen Printing Machine MT-320 Series
Printing Area: 150mm. A compact screen printing machine that possesses all the necessary functions. Suitable for small-size printing with a printing area of 150mm or less. Ideal for research and development purposes.
Squeegee Attachment Procedure
Before starting the squeegee parallel adjustment, let’s first explain the squeegee attachment method.
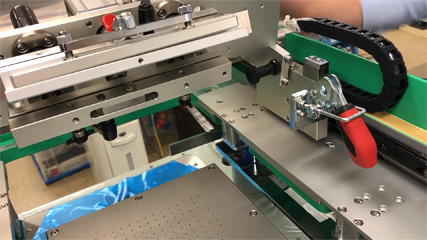
Step 1: Unlock the locks on the left and right knobs.

Step 2: Lift the squeegee head unit.

★Work Point★
Always extend the stoppers on the sides to secure the unit and prevent it from falling!


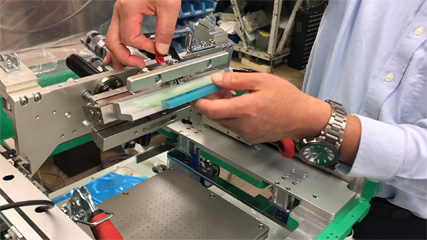
Step 3: Attach the Micro Squeegee to the squeegee head unit.

★Work Point★
Make sure to firmly attach the squeegee to the holder!

Push in the red locking lever on the upper side of the holder to secure the squeegee.

Step 4: Lower the squeegee head unit and lock it with the knobs.


Step 5: The squeegee attachment is now complete.

Squeegee Parallel Adjustment Procedure
Step 1: Place two thin strips of paper on the table.


★Work Point★
Place the paper parallel to each other.
When adjusting in a cleanroom, clean paper is recommended.
Step 2: Lower the squeegee.

The paper will be pressed against the squeegee.
Step 3: Turn the dial on the squeegee head and adjust the pressure.

★Work Point★
Turning clockwise loosens the pressure, and counterclockwise tightens it.
While turning the dial, lightly move the paper with your hand to check the contact between the squeegee and the table. If there’s no parallelism, one side of the thin paper will have weaker contact while the other side will have stronger contact.

It’s evident that the squeegee is tilted and the force applied is uneven.

Step 4: Loosen the lock lever of the parallel adjustment unit.

Turning counterclockwise will unlock it.
Step 5: Turn the knob to adjust parallelism.

★Work Point★
The parallel adjustment unit is designed like a seesaw:
- Clockwise: The left side lowers, and the right side rises.
- Counterclockwise: The left side rises, and the right side lowers.
While turning the knob, move the paper with your hand to adjust the contact between the squeegee and the table evenly on both sides.

Step 6: Tighten the lock lever of the parallel adjustment unit.

Turning clockwise will lock it.
Now the squeegee parallel adjustment is complete.

Perform a test print using dummy work to ensure that the pattern is evenly printed before proceeding with the actual printing!
Products Used in This Article

Screen Printing Machine MT-320 Series
Printing Area: 150mm. A compact screen printing machine that possesses all the necessary functions. Suitable for small-size printing with a printing area of 150mm or less. Ideal for research and development purposes.

Micro Squeegee
Ideal squeegee for practical application of proper printing pressure processes
If the squeegee is worn out, it may cause variations in the pattern!
Micro Tech Co., Ltd. offers a convenient and cost-effective “squeegee regrinding” service. Please feel free to contact us!

Squeegee Regrinding Service
Send us your unusable Micro Squeegee, and we’ll regrind it to ensure straightness of the urethane tip!
Translation by GPT.
